
With an abundance of light, photographing the sun may seem like an extremely easy thing to do. It is this abundance of light, which includes harmful infrared and ultraviolet radiation, that presents the problems associated with solar photography.
As kids, many of us experimented with a magnifying glass using it to focus the image of the sun and thus concentrated the sun’s rays to produce a spot image having intense heat (primarily produced by the mostly invisible infrared rays) sufficient to ignite a piece of paper or fry an ant. Imagine what would happen of that focused image fell on a piece of film in your camera or on the retina of your eye!
The invisible high energy ultraviolet radiation could also cause permanent damage to your eye unless proper filtration is used. Using the wrong type of filter to observe the sun could allow this radiation to pass through and cause eye damage even though the intense visible rays from the sun are reduced to a comfortable level. For these reasons, a safe solar filter must be employed to reduce the harmful radiation from the sun and allow for reasonable exposure times and comfortable viewing.
Solar filters from Thousand Oaks Optical, Baader, Orion and others are of either glass or Mylar designed specifically for solar use. If you own a name brand telescope, custom filters designed to fit over the front end of the main tube are available. Schmidt Cassegrain and Newtonian reflecting scopes may employ a full aperture or an off axis type of filter. These “visual” solar filters allow you to observe and photograph the sun safely and take advantage of the high resolution that your telescope provides. Never use solar filters that are designed to be used at the eyepiece end of the telescope! A decade or so ago, these eyepiece solar filters were commonly included with many department store and imported refractor telescopes and there were many horror stories of these filters cracking from the intense heat of the focused sun while someone was looking through the eyepiece! If you have one of these filters, destroy it!
To obtain photographs of the sun that show any sunspots to good effect, a focal length of at least 1000mm (equivalent to 20X) must be used. Due to atmospheric limitations, you gain very little using telescopes having apertures over 4-inches. For more detail, higher magnifications must be employed and are usually achieved by using barlow or eyepiece projection techniques. A means to attach your cameras to the telescope where the eyepiece is usually located makes this and other types of photography most convenient. Your camera, however, must be one that the lens can be removed and replaced by this adapter. Get an adapter that also accepts eyepieces so projection photography may also be employed. Many astronomical supply companies sell these adapters for very reasonable prices. If your camera does not have a removable lens but is a reflex camera (allows you to view and focus through the lens), an afocal method can be employed where the camera is mounted on a tripod and the image of the sun projected into the camera lens which is set wide open and at infinity. The image is then observed through the camera and focused using the telescope.
The best film for solar photography is slow black and white film. The very best in this category is Kodak’s Technical Pan 2415. For the beginner, however, slow color film may also be used. It is not important whether you use slide or print film but stick to speeds of ASA100 or less to get the contrast necessary to record sunspots well.
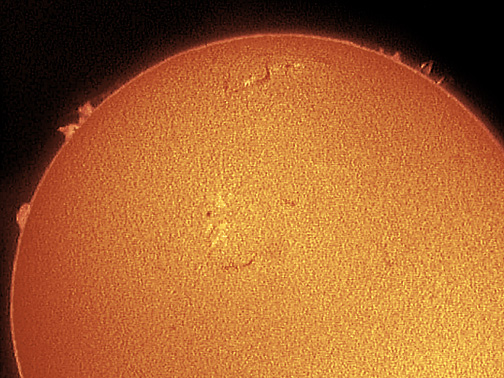
Most solar filters produce an orange or bluish image (Mylar-type). The Baader filter material produces a more normal white image but you will have to make your own filter cell as the Mylar-type material is all that is available. Most prefer the light orange color as produced by the Thousand Oaks and others.
Since exposure times are usually quite short, you do not need a tracking mount, however, having to reposition, focus and shoot in a short period of time can be a nuisance. If your camera has through the lens metering, then start with that exposure and bracket one or two stops on either side of it. Use a cable release or the timer on your camera to make the exposures and minimize vibrations. Keep good notes so that bracketing will not be necessary once you know the best exposure for the different lens systems and films you employ. Many of the techniques you use for solar photography will apply directly to Lunar and planetary photography to be covered in a later article. The best advice is to just get out and do it. Learn from your mistakes and before long, you will be producing high quality images of the sun to be proud of.
Follow Us: